Install the agent on Windows
This page takes a Windows host from nothing to a proven agent: prepare the machine, install the agent, give it credentials, start it, then test it with Open Text. Hosts running Linux or macOS have their own pages.
Before you start, the control plane must be installed, and you need administrator rights on the host and an administrator account in the Istari Digital Platform. You download the agent package from the Customer Portal and create the agent's key in the web app, so have both open. Plan about an hour.
Where a filename contains X.Y.Z, substitute the agent version you downloaded — for agent 11.7.1, istari_agent_X.Y.Z.exe is istari_agent_11.7.1.exe. Angle brackets mark values you supply.
1. Prepare the host
The host should run one of:
- Windows 10
- Windows 11
- Windows Server 2019
- Windows Server 2022
The agent is meant to run continuously so users get 24/7 service, so configure the host to minimize sleeping, hibernation, and automated shutdowns and restarts. After a restart the agent comes back when the account that installed it next signs in — the installer's Run on startup option, checked by default, registers it to start at that account's logon. It does not start at boot, so a host nobody signs in to stays offline until someone does.
The account the agent runs as
The agent runs as a logged-on Windows user. It is not a Windows service and does not run as SYSTEM or Local Service, so the site has to permit some account for the agent to run under. A named human operator account is enough; no Istari-specific service account is required, and you do not need to create one. Can I run the agent as a Windows service? explains why.
This is a real prerequisite rather than a formality. A site whose policy permits neither a local nor a domain account for the agent to run under cannot run the agent in this release. If that is your situation, talk to us before you plan a deployment.
Expect one operator account per host. The agent's configuration is stored per user in this release, so the account that holds the configuration is the account that runs the agent. Installing for one person and operating as another is possible and covered under If a different account will operate the agent, but it needs an extra step.
A second prerequisite applies only if you intend to use Run on startup: the agent auto-starts from an entry in the operating account's own user profile, under HKEY_CURRENT_USER, not a machine-wide one. A site whose policy prohibits programs starting automatically from a user session should untick Run on startup during the install and launch the agent from the Start-menu or desktop shortcut instead. That is a supported configuration, not a workaround — the shortcuts are installed either way.
If outbound traffic on this host must pass through a forward proxy, or the firewall blocks direct access to object storage, set the proxy before you start the agent — see Proxy configuration.
One agent can host any number of modules, and modules add requirements of their own. Check each module's Prerequisites before you commit to a host.
2. Install the agent
There are two Windows installers, and which one you want depends on whether the agent has to live under Program Files:
| Installer | Installs for | Agent and modules | Data and logs |
|---|---|---|---|
istari-agent_X.Y.Z_windows-amd64.msi | the installing user | %LOCALAPPDATA%\istari_agent\ | %LOCALAPPDATA%\istari_agent\ |
istari-agent_X.Y.Z_windows-per-machine-amd64.msi | the machine | %ProgramFiles%\IstariDigital\istari_agent\ | %ProgramData%\IstariDigital\istari_agent\ |
Take the per-user installer unless something requires otherwise. Take the per-machine installer when application-control policy on this host only allows programs to run from Program Files, which is the usual reason to need it. It requires administrator rights to install; the per-user one does not.
Both installers produce an agent that runs the same way: as a logged-on user, with no Windows service involved. Neither registers a service.
Download the installer you want from the Istari Customer Portal — choose the agent assets under dist, open Asset details, then Download. See Download Istari software from the Customer Portal.
Copy the MSI onto the host, then double-click it and accept the default options in each screen. Run on startup is ticked by default; leave it ticked unless the prerequisite above says otherwise.
To install without the wizard, run it from PowerShell. Per-user:
msiexec /i C:\PATH\TO\istari-agent_X.Y.Z_windows-amd64.msi /qn
Per-machine, from an elevated prompt:
msiexec /i C:\PATH\TO\istari-agent_X.Y.Z_windows-per-machine-amd64.msi /qn
A quiet install takes the wizard's defaults, so Run on startup is registered. Add AUTOSTART=0 to leave it out:
msiexec /i C:\PATH\TO\istari-agent_X.Y.Z_windows-per-machine-amd64.msi /qn AUTOSTART=0
Where it is registered, the entry goes under HKEY_CURRENT_USER\Software\Microsoft\Windows\CurrentVersion\Run for the account running the installer, so the agent starts each time that account signs in.
The per-machine installer puts a shortcut on the Start menu and the desktop whichever way Run on startup is left, since with it unticked the shortcut is the only way to launch the agent. On the per-user installer the desktop shortcut is its own wizard option, checked by default.
Pick one scope and stay with it. Moving between them is possible but takes an extra step — see Switching from a per-user to a per-machine install.
Upgrading
To upgrade, install the new version over the old one with the same installer you used before. There is no need to uninstall first.
Switching from a per-user to a per-machine install
Changing install scope is a two-step migration, not an upgrade:
- Uninstall Istari Agent from Apps & features.
- Run
istari-agent_X.Y.Z_windows-per-machine-amd64.msi.
The per-machine installer will refuse to run while a per-user install is present, and tells you this. That is deliberate. Windows itself will not replace a per-user installation with a machine-wide one — Windows Installer only looks for an existing version of a program within the same install scope, so a machine-wide installer does not see a per-user copy and cannot remove it. Left to itself it would install alongside, leaving two agents registered on the host and a startup entry that stops working as soon as anyone tidies up the old one. Refusing and asking you to uninstall first avoids that.
Configuration and credentials survive the switch. The configuration lives in the operating account's profile, and uninstalling removes only what the installer put on the host, so a credentials file you placed under the old install folder is left where it is. The agent also keeps its identity: when the same account operates it, it still reads the istari_agent_id it wrote under %LOCALAPPDATA%\istari_agent\. Modules do not carry over. They stay in the per-user folder while the per-machine agent scans %ProgramFiles%\IstariDigital\istari_agent\istari_modules, which the installer creates empty, so unpack them there from an elevated prompt after the switch; until then the agent runs with no modules and claims no jobs. The log moves to %ProgramData%\IstariDigital\istari_agent\.
Going the other way — per-machine back to per-user — is the same two steps in reverse.
If this host runs the agent as a Windows service. The Windows service was a beta feature in 11.4.0 and has been removed. Installing this release over a service install removes the service and replaces it with the ordinary non-service agent, which then starts when the operating account signs in rather than at boot.
If you want the service gone without installing this release, remove it from an elevated prompt:
sc.exe stop IstariAgentLauncher
sc.exe delete IstariAgentLauncher
Then uninstall Istari Agent from Apps & features. Either way, re-read The account the agent runs as: a service install did not need a logged-on user and this release does.
If this site does not allow installers to run
Some sites block running MSIs outright rather than blocking a particular file. Windows Installer's administrative-install mode unpacks the payload without installing anything, so you can stage the agent's files and place them yourself:
msiexec /a C:\PATH\TO\istari-agent_X.Y.Z_windows-per-machine-amd64.msi /qn TARGETDIR=C:\PATH\TO\STAGING
The agent executable appears under the staging directory, in the same layout the installer would have created. Copy that layout to its intended location.
What you take on by doing this is everything the installer would otherwise have done for you: create the istari_modules folder beside the agent, create %ProgramData%\IstariDigital\istari_agent\, add the shortcut, and — if you want the agent to start at sign-in — add the Run entry yourself under HKEY_CURRENT_USER\Software\Microsoft\Windows\CurrentVersion\Run, as the operating account, with the executable's full path in quotes (the path contains a space).
If Windows refuses the installer
Two unrelated things produce a refusal, and the wording tells you which one you have.
"The system administrator has set policies to prevent this installation" means Windows Installer itself is turned off by policy, whatever the file is. Search gpedit in the Start menu, then go to Local Computer Policy > Computer Configuration > Administrative Templates > All Settings and select Turn off Windows Installer. Set the policy to Enabled and Disable Windows Installer to Never.
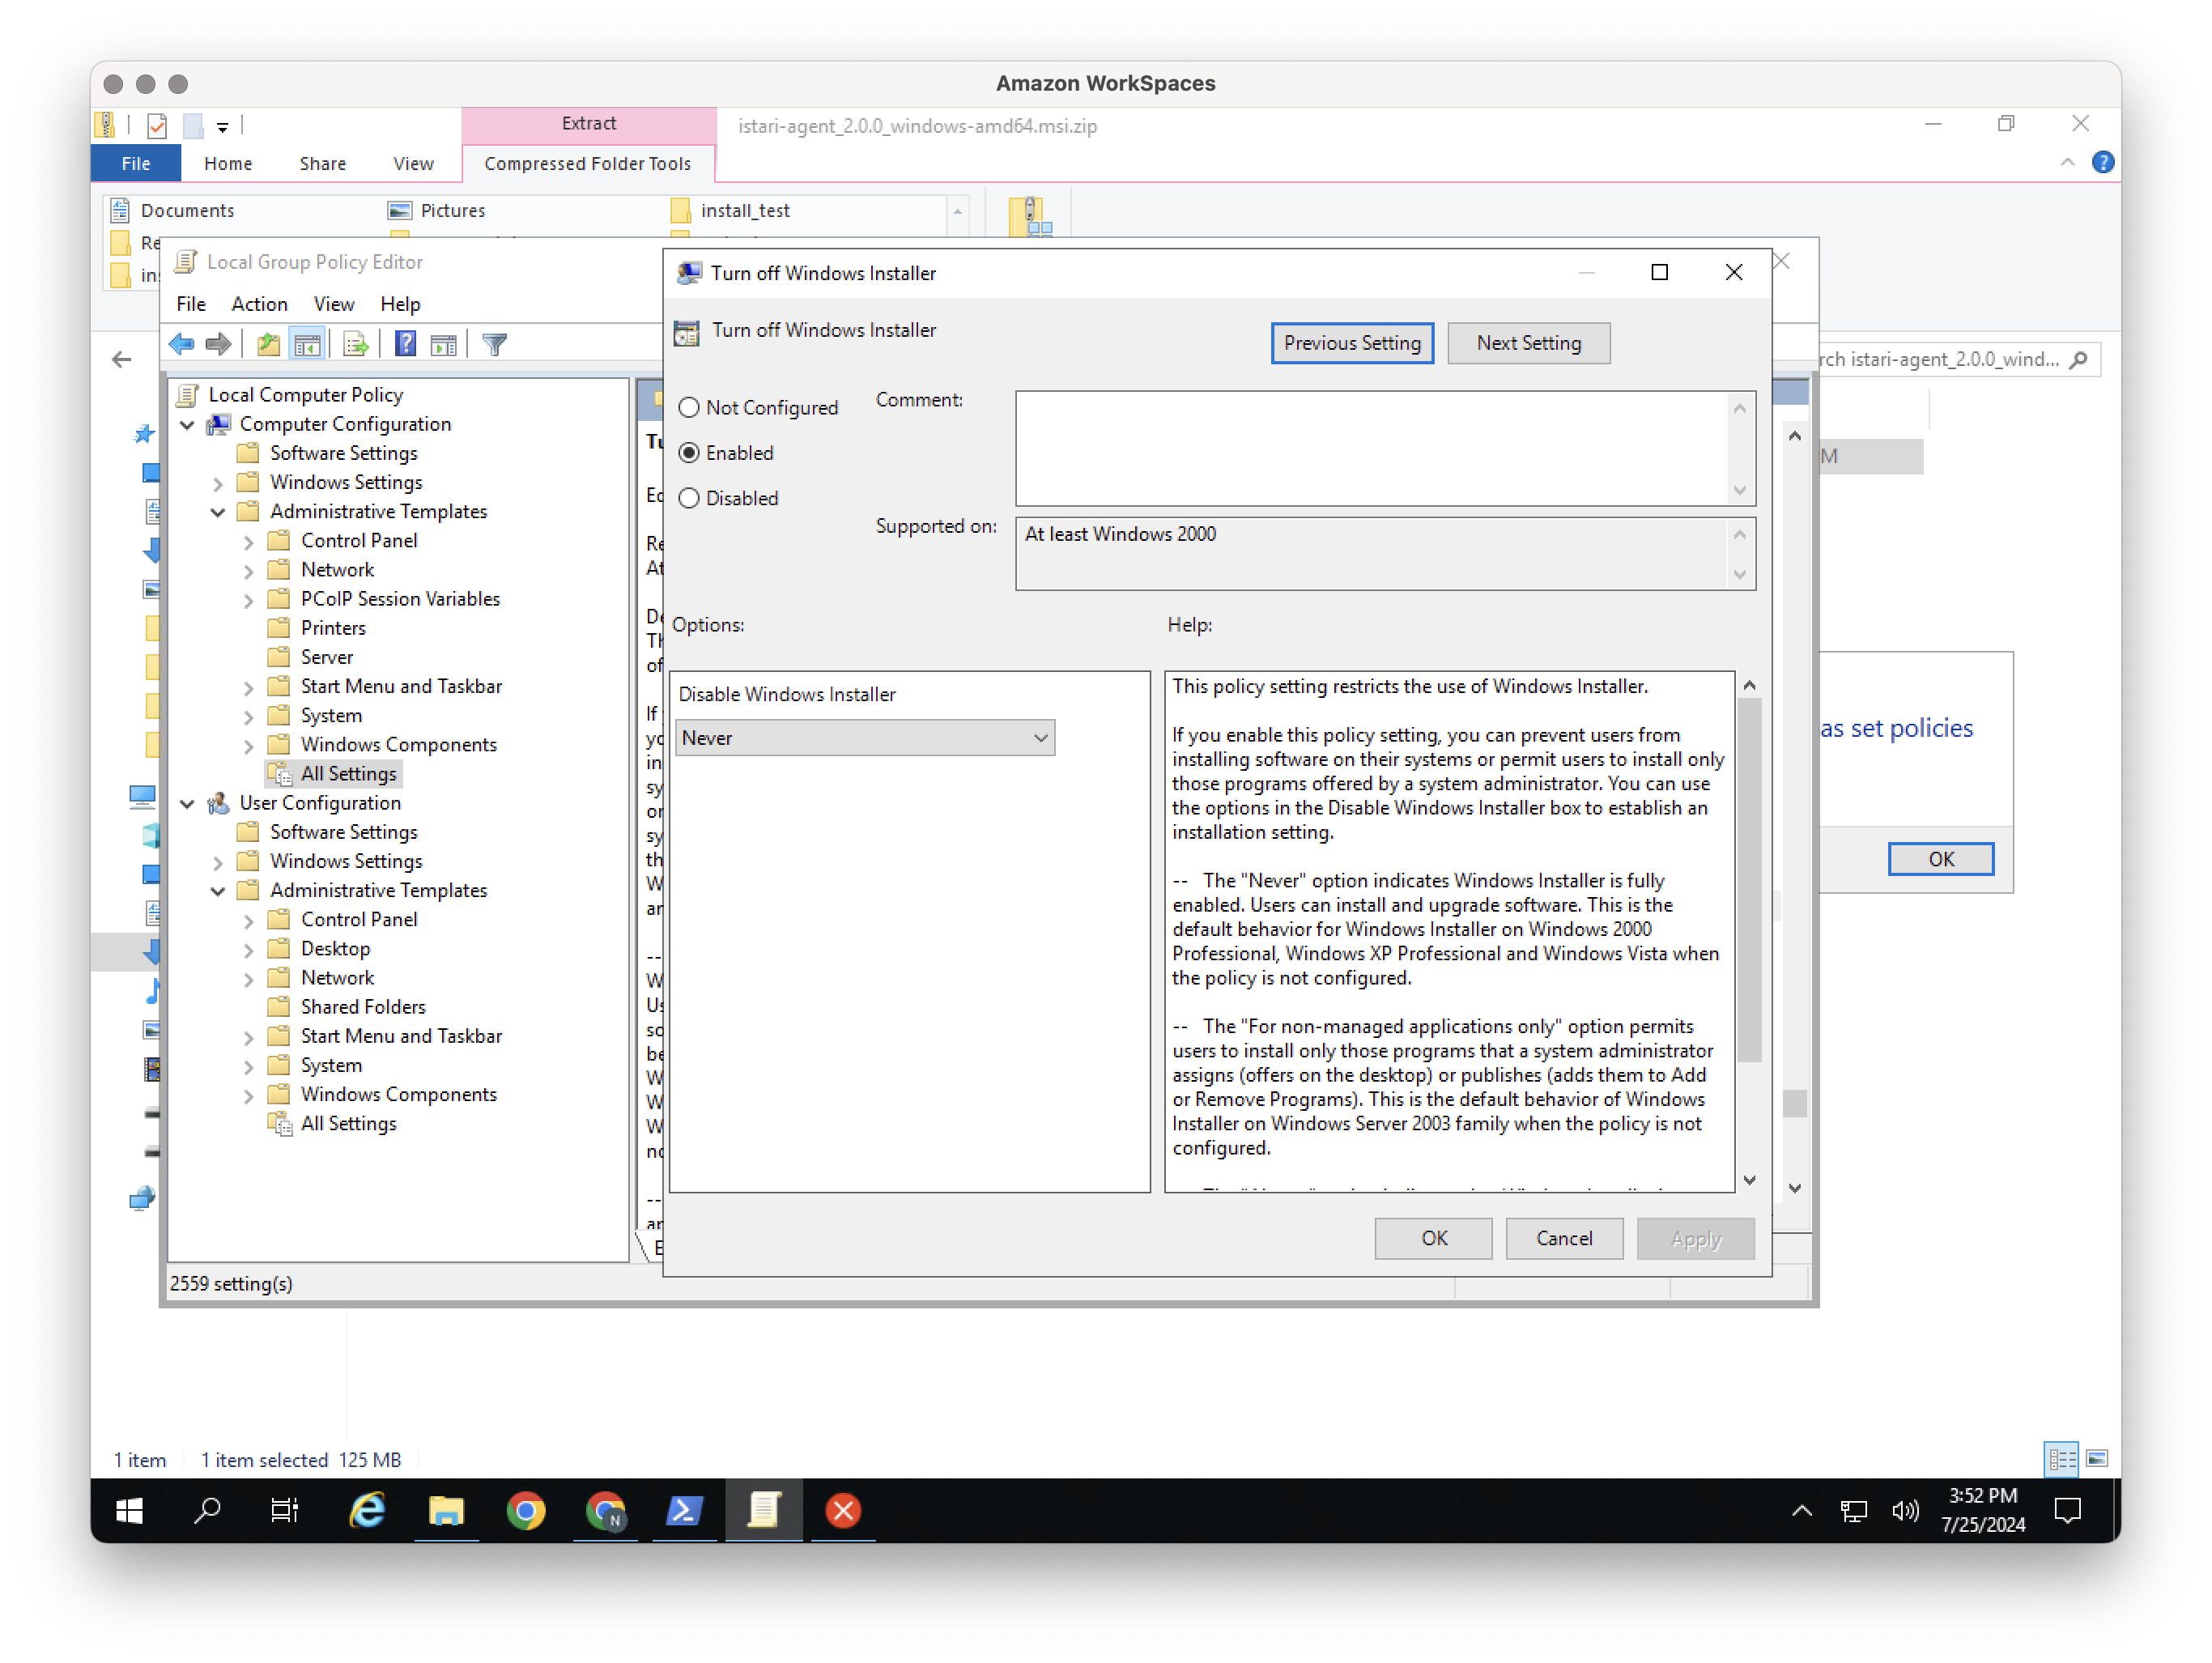
A trust warning instead is about the file rather than about Windows Installer — but three different things produce one, and only the first is fixed by unblocking the file.
- "Windows protected your PC", or a warning about an unrecognized app. SmartScreen, reacting to the mark Windows attached when the file was downloaded. Clearing that mark resolves it: run
Unblock-Fileagainst the installer, or right-click it, select Properties, and check Unblock in the Security section. - A block attributed to your organization or your system administrator. Application control — WDAC or AppLocker — is refusing the file by policy. Unblocking does nothing here; the fix is a rule in that policy.
- A prompt about an unknown publisher. The signature did not validate, usually an incomplete download or a missing root certificate. Do not unblock and install it; verify the signature first.
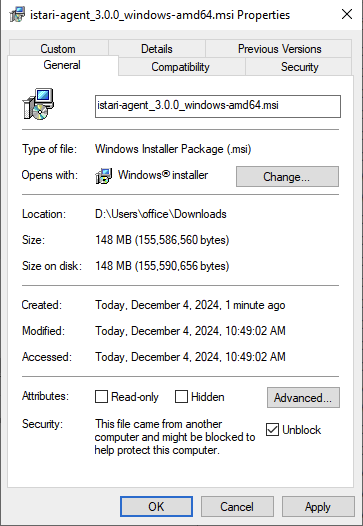
On a centrally managed host, handle this once for the fleet rather than per machine. Trusting the Windows installers covers verifying the signature, staging the MSI so it never picks up the download mark, and allow-listing Istari Digital by publisher in WDAC, AppLocker, or Trusted Publishers.
3. Give the agent its credentials
The agent you install in step 2 is not yet known to the platform. You register it from the web app at the same time as you give it a key to sign in with — there is no separate “create agent” form, and you do not need to pick a name or ID first.
The first three steps below need an administrator of the tenant this agent will serve: a Tenant Administrator or Platform Administrator (on installations without tenant management, an organization administrator). If you are not one, ask one to do them.
-
Sign in to the web app in the tenant the agent will serve. The agent joins the tenant you are signed in to when you generate its key; Agent Multi-Tenancy covers installations with more than one tenant.
-
Open Agents and select Generate Key. In the New Agent Access Key dialog, enter an Agent name (optional) if you want one, then select Generate. This one action registers a new agent identity on the platform and issues the key the agent will use. The agent appears under All Agents only after you start it in step 4. The name you entered labels the key. The agent's name under All Agents is assigned by the platform, unless you set your own as described in Confirm it registered.
-
Select Download credentials while the key is on screen. The browser saves
agent-credentials-<key id>.json, which holds the private key and is shown only once — losing it means generating another key.Send the key file securelyIf someone else installs the agent, send them this file as securely as you would a password. It holds the agent's private key: anyone who has the file can act as the agent, and the web app cannot show the key again.
-
Copy that file onto the host, into a folder the account that will run the agent owns, such as
%USERPROFILE%\istari_digital\. Restrict it to that account in Properties → Security so other users on the host cannot read the private key. -
Copy your platform's API URL from Settings → Developer Settings → Endpoints in the web app.
-
Create
%LOCALAPPDATA%\istari_digital\istari_digital_config.yamlas that same account, with the URL and the path to the file you just copied:default: {}agent:istari_digital_agent_digital_api_url: "https://api.example.istari.app"istari_digital_agent_identity_service_secret_file: "C:\\Users\\<account>\\istari_digital\\agent-credentials-<key id>.json"istari_digital_agent_identity_service_enabled: true# Optional. Name shown under All Agents; omit it and the platform assigns one.# istari_digital_agent_display_name: "Windows lab 01"Backslashes in a YAML path have to be doubled, as above, or written as forward slashes.
The configuration stores the path to the credentials file rather than its contents, so the agent reads it on every start and fails if the file moves. Both files must belong to the account that runs the agent — an agent that cannot find its configuration writes a placeholder file and exits a few seconds after starting.
The location is the same for both installers: the configuration always lives in the operating account's own profile, never in the install directory, even when the agent itself is under Program Files.
The clientId inside the credentials file is the agent's Client ID, the identity it presents when it authenticates. Which identifier is which separates it from the Agent ID and the other values you will meet, and Agent keys covers rotating a key later or migrating an agent off a deprecated PAT.
If a different account will operate the agent
The per-machine installer needs administrator rights, so an administrator may install it for someone else to operate. The install itself is fine; what does not carry across is the configuration, because it goes into the profile of whoever ran the installer. The operating account starts an agent that finds no configuration of its own.
Have the operator do step 3 as themselves — write %LOCALAPPDATA%\istari_digital\istari_digital_config.yaml and place the credentials file under their own profile — and the agent works normally from then on. Signing in as the operator and starting the agent once is enough to create the folder and a placeholder configuration to edit in place.
Alternatively, supply the same values as environment variable overrides for that account, which suits hosts built from an image where you would rather not hand-edit a file per machine.
Two other things follow from a second account operating the agent, both worth knowing before you plan it:
- Run on startup applies to the installing account, not the operator. The installer writes the Run entry to the profile of whoever ran it. If that was an administrator and someone else operates the host, the operator has no Run entry and signing in starts nothing — they launch the agent from the Start-menu or desktop shortcut, which every account on the host can see. The flip side is the reason it works this way: no unrelated user who signs in ever starts an agent.
- The first account to run the agent owns its files. The installer sets no permissions on
%ProgramData%\IstariDigital\istari_agent\, so Windows' defaults apply: any local user can read it and create files in it, and only the account that created a file can modify it. If an administrator starts the agent first and the operator starts it later, the operator may not be able to write the existing log or agent-id files. Keep to one operating account per host and the question does not arise.
4. Start the agent
Sign in as the operating account and start the agent:
- If Run on startup was left ticked, signing in starts it. There is nothing else to do.
- Otherwise, use the Istari Agent shortcut on the Start menu or the desktop.
- Or run the executable directly:
istari_agent_X.Y.Z.exe, in%LOCALAPPDATA%\istari_agent\for a per-user install or%ProgramFiles%\IstariDigital\istari_agent\for a per-machine one.
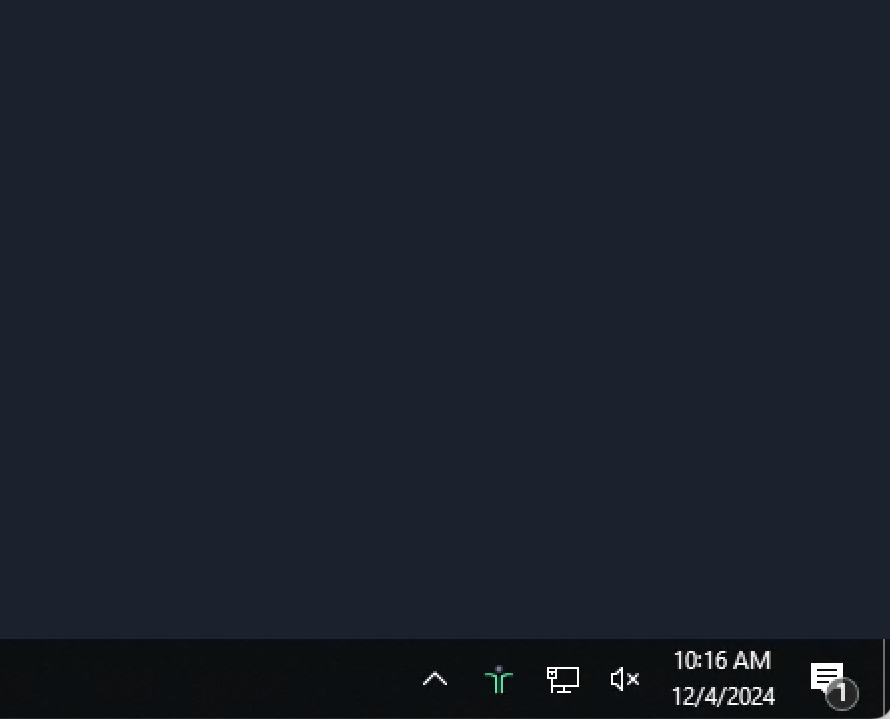
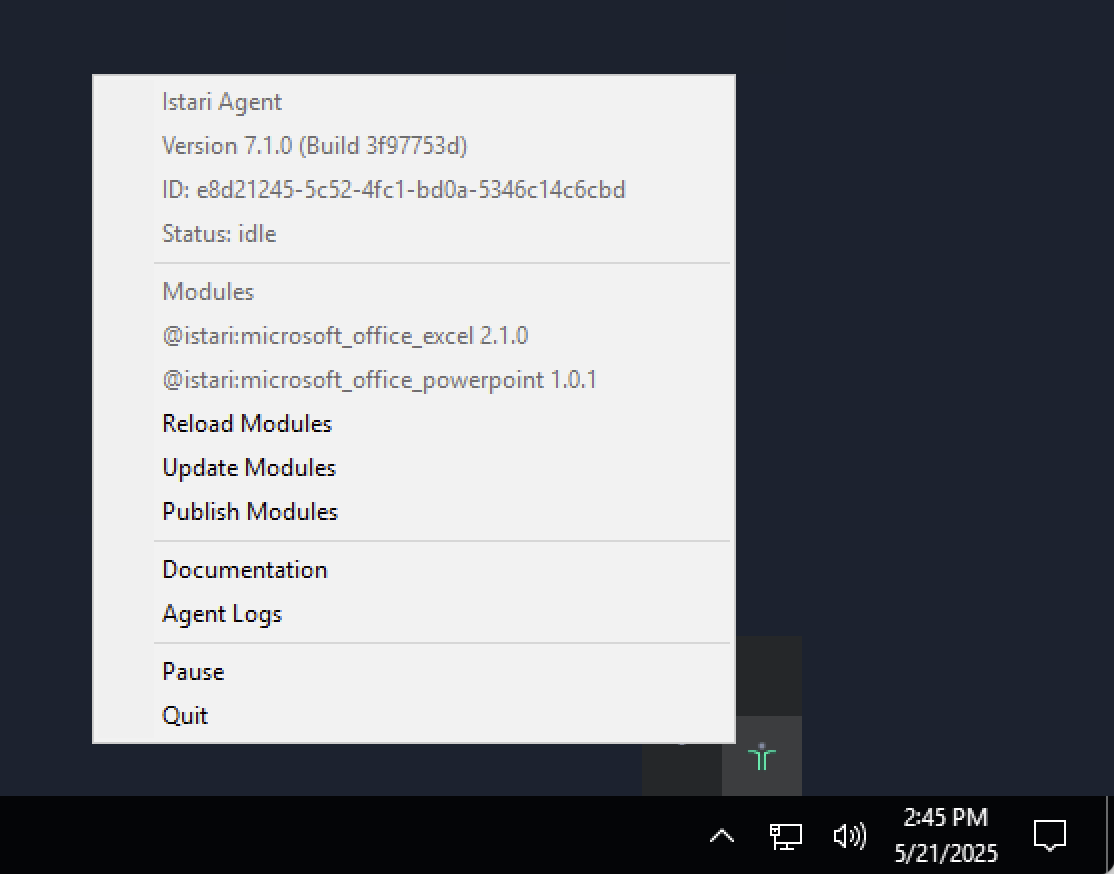
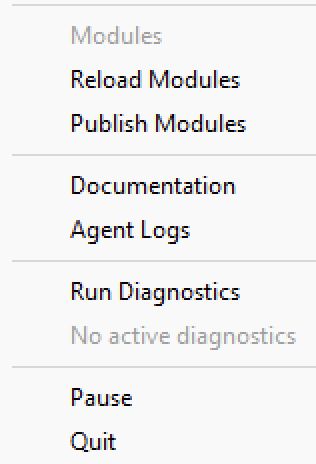
The agent may take up to a minute to start. Once it is running, an Istari Digital logo appears in the system tray; right-click it for agent status and the option to pause or quit.
If nothing appears to happen. An agent whose configuration still holds the placeholder values reports that they need replacing and exits, and on Windows it does that without a window and without writing to the log. So an agent that has been installed but not yet configured looks like an agent that did nothing at all. Check istari_digital_config.yaml for the placeholder values from step 3 before looking anywhere else.
Building that tray menu needs a desktop session. Where the operating account signs in but you would rather the agent ran without a tray icon, set istari_digital_agent_headless_mode in the agent section of istari_digital_config.yaml:
agent:
  istari_digital_agent_headless_mode: true
On Windows, headless mode only removes the GUI — it does not start the agent, and there is no mode in this release that runs the agent without an account signed in. A Windows host that nobody signs in to will not run an agent; see The account the agent runs as and the Install FAQ.
5. Confirm it registered
On a successful start the log records the name the platform assigned, for example:
INFO - Got display name 'iconic-morgoth-9091' from server
Ask an administrator of the agent's tenant to check that the same name appears under All Agents in the web app. If it does, the agent reached the platform.
If the name does not appear, read the log:
%LOCALAPPDATA%\istari_agent\istari_agent.logfor a per-user install%ProgramData%\IstariDigital\istari_agent\istari_agent.logfor a per-machine install
The Istari Digital Agent menu in the system tray opens the same log. Common failure modes are in Troubleshooting.
Set istari_digital_agent_display_name under agent: in istari_digital_config.yaml and restart the agent. All Agents then shows that name, and the log reports it.
Optional: run the agent's diagnostics
Starting with agent v9.4.0, the diagnostics exercise the whole job path end to end: receiving an assigned job, running it, handling success and failure, uploading results, and returning to IDLE.
Right-click Run Diagnostics in the system tray to start the test.
NOTE: When prompted, provide a human personal access token. The diagnostics do not work with an agent token.
A message pops up with the result. In the web app you can then open the two models the diagnostics uploaded and their jobs:
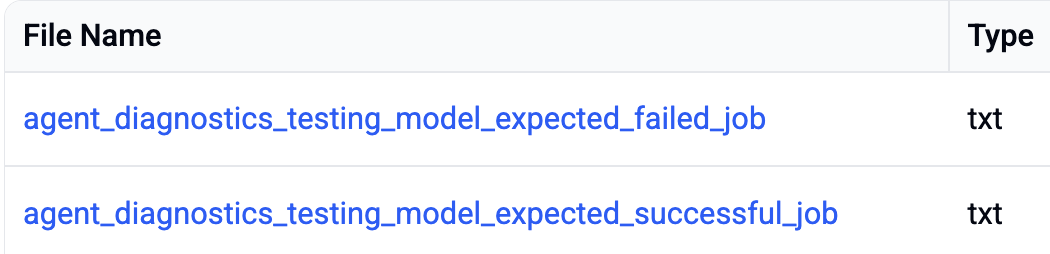
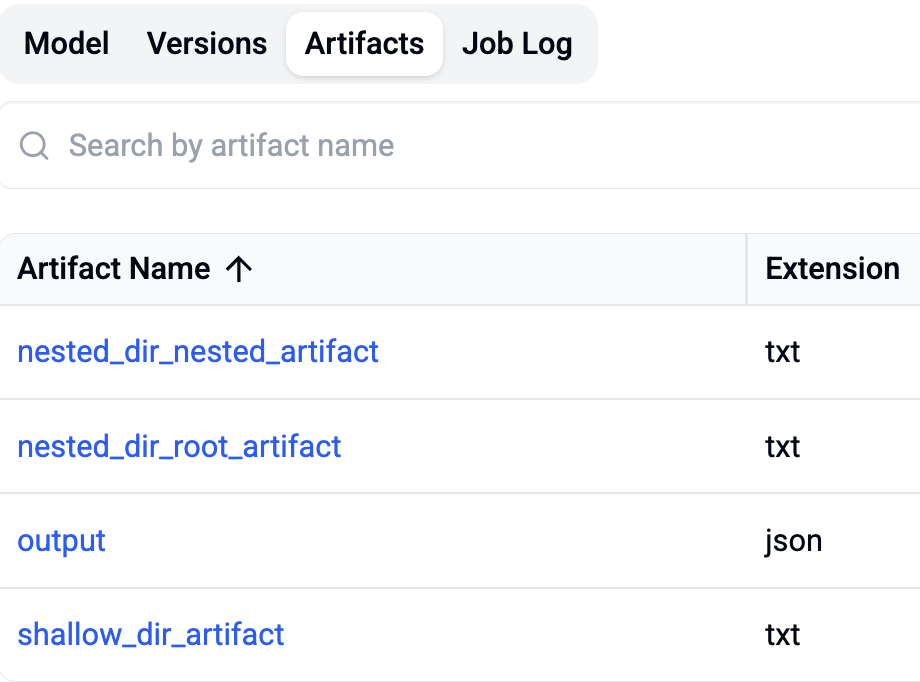
The agent log has more detail on each step.
6. Test with an open-source module
Prove this agent can run a job before you add licensed tools. Open Text needs no commercial license and no module YAML keys, and it runs on Windows, Linux, and macOS.
- Install and authenticate
stariif it is not already on this host. - Deploy Open Text (portal name textract) following the Module deployment instructions.
- In the web app, upload a small
.txt(or.csv) file. - Run
@istari:extractwith tool Open Text. Set Operating system to Windows. - When the job completes, open the artifacts (extracted text and metadata report).
If the job stays pending, the agent OS or installed modules do not match the job — see How agents match jobs. Then add Open PDF and Open Spreadsheet the same way if the team needs everyday documents.
Next steps
- Agent configuration reference for every configuration key, including module configuration and log level.
- Proxy configuration if outbound traffic must pass through a forward proxy.
- Agent multi-tenancy if this host serves more than one tenant.
If you get stuck, contact support@istaridigital.com.